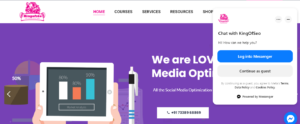
How to add Facebook messenger plugin to WordPress website
Chat Plugin is a free chat extension that you can install on your website to enable messaging. When people visit your website and click on the chat button, it will send them directly into a Messenger conversation to chat with your business. If people are logged in to their Facebook accounts, the conversations will be saved in Messenger. Otherwise, they can message you as a guest user.

There are two parts to completing the installation. First, you will set up Chat Plugin from your Facebook Page, then you will add the code for the plugin to your website. If you’re having trouble with loading Chat Plugin, use our diagnostic tool to check for errors. This diagnostic tool will identify common issues and help you resolve them.
Set up Chat Plugin from your Facebook Page
- Go to your Page’s Settings and click Messaging.
- Under Add Messenger to your website, click Get started.
- From here, you can either:
- Install manually by clicking Set up. From here, you can select your language, add your website domain(s) and copy the code to paste on your website.
- Follow the Add Chat Plugin to your website steps below based on your chosen website builder and paste the code on the page(s) where you want the Chat Plugin to appear.
- Under Start a conversation, you can create a welcome message and add automated responses for frequently asked questions.
- Under Customise your chat plugin options, you can customize the color, alignment, and expansion settings.
Add the chat plugin to your wordpress website
After you’ve completed the chat plugin setup from your Page, you can paste the code directly into your website from your preferred website builder:

Note: Make sure you’re logged in to Facebook on your browser and that you’re the administrator of your Facebook Page.
- Go to your WordPress home page and go to WP admin.
- Go to the Plugins menu.
- Click Add New.
- In the search field, type Facebook chat plugin.
- Click Search plugins.
- Select the Facebook chat plugin.
- Click Install Now.
- Click Activate.
- You should now see a tab that says Customer chat. Go to the Getting started section and click Edit chat plugin.
- Customise your chat plugin and complete your setup.
Customers can now message you from your website, and your messages will be shown in your business Page Inbox.

No comments:
Post a Comment